Edit Waypoint Wayline
The Waypoint Wayline is a specific type of wayline that consists of multiple waypoints linked by a path, enabling various actions to occur along its route. These actions include capturing fixed-angle photos, adjusting zoom levels, changing the altitude and speed, initiating or halting video recording, adding the interval shots, focusing on points of interest, and more. Unlike the Area Wayline (referred to as the Grid Wayline), which is polygon-based, the Waypoint Wayline does not necessitate the generation of intersection points or complex calculations involving horizontal and vertical distances based on overlapping rates. Instead, all actions are manually added by users during the creation of a new wayline.
The Waypoint Wayline Editor supports using the mouse to control a virtual aircraft to plan waypoint wayline, adjusting the waypoint location and shooting angle based on the imported 3D models, as well as checking whether the wayline are safe.
To establish a Waypoint Wayline, users can select the takeoff point by clicking on the map and subsequently add waypoints while incorporating actions such as taking fixed-angle photos, adjusting zoom levels, and so on. Similar to the Area Wayline, the Waypoint Wayline supports three altitude modes: Above Sea Level (ASL), Absolute Altitude (ALT), and Above Ground Level (AGL). The next section outlines the process for determining the flight altitude in accordance with the selected altitude mode.
Waypoint List
Displays the added waypoints and waypoint actions located on the left sidebar.
- Click the waypoint or action icon, and the waypoint will be displayed in the middle of the web page.
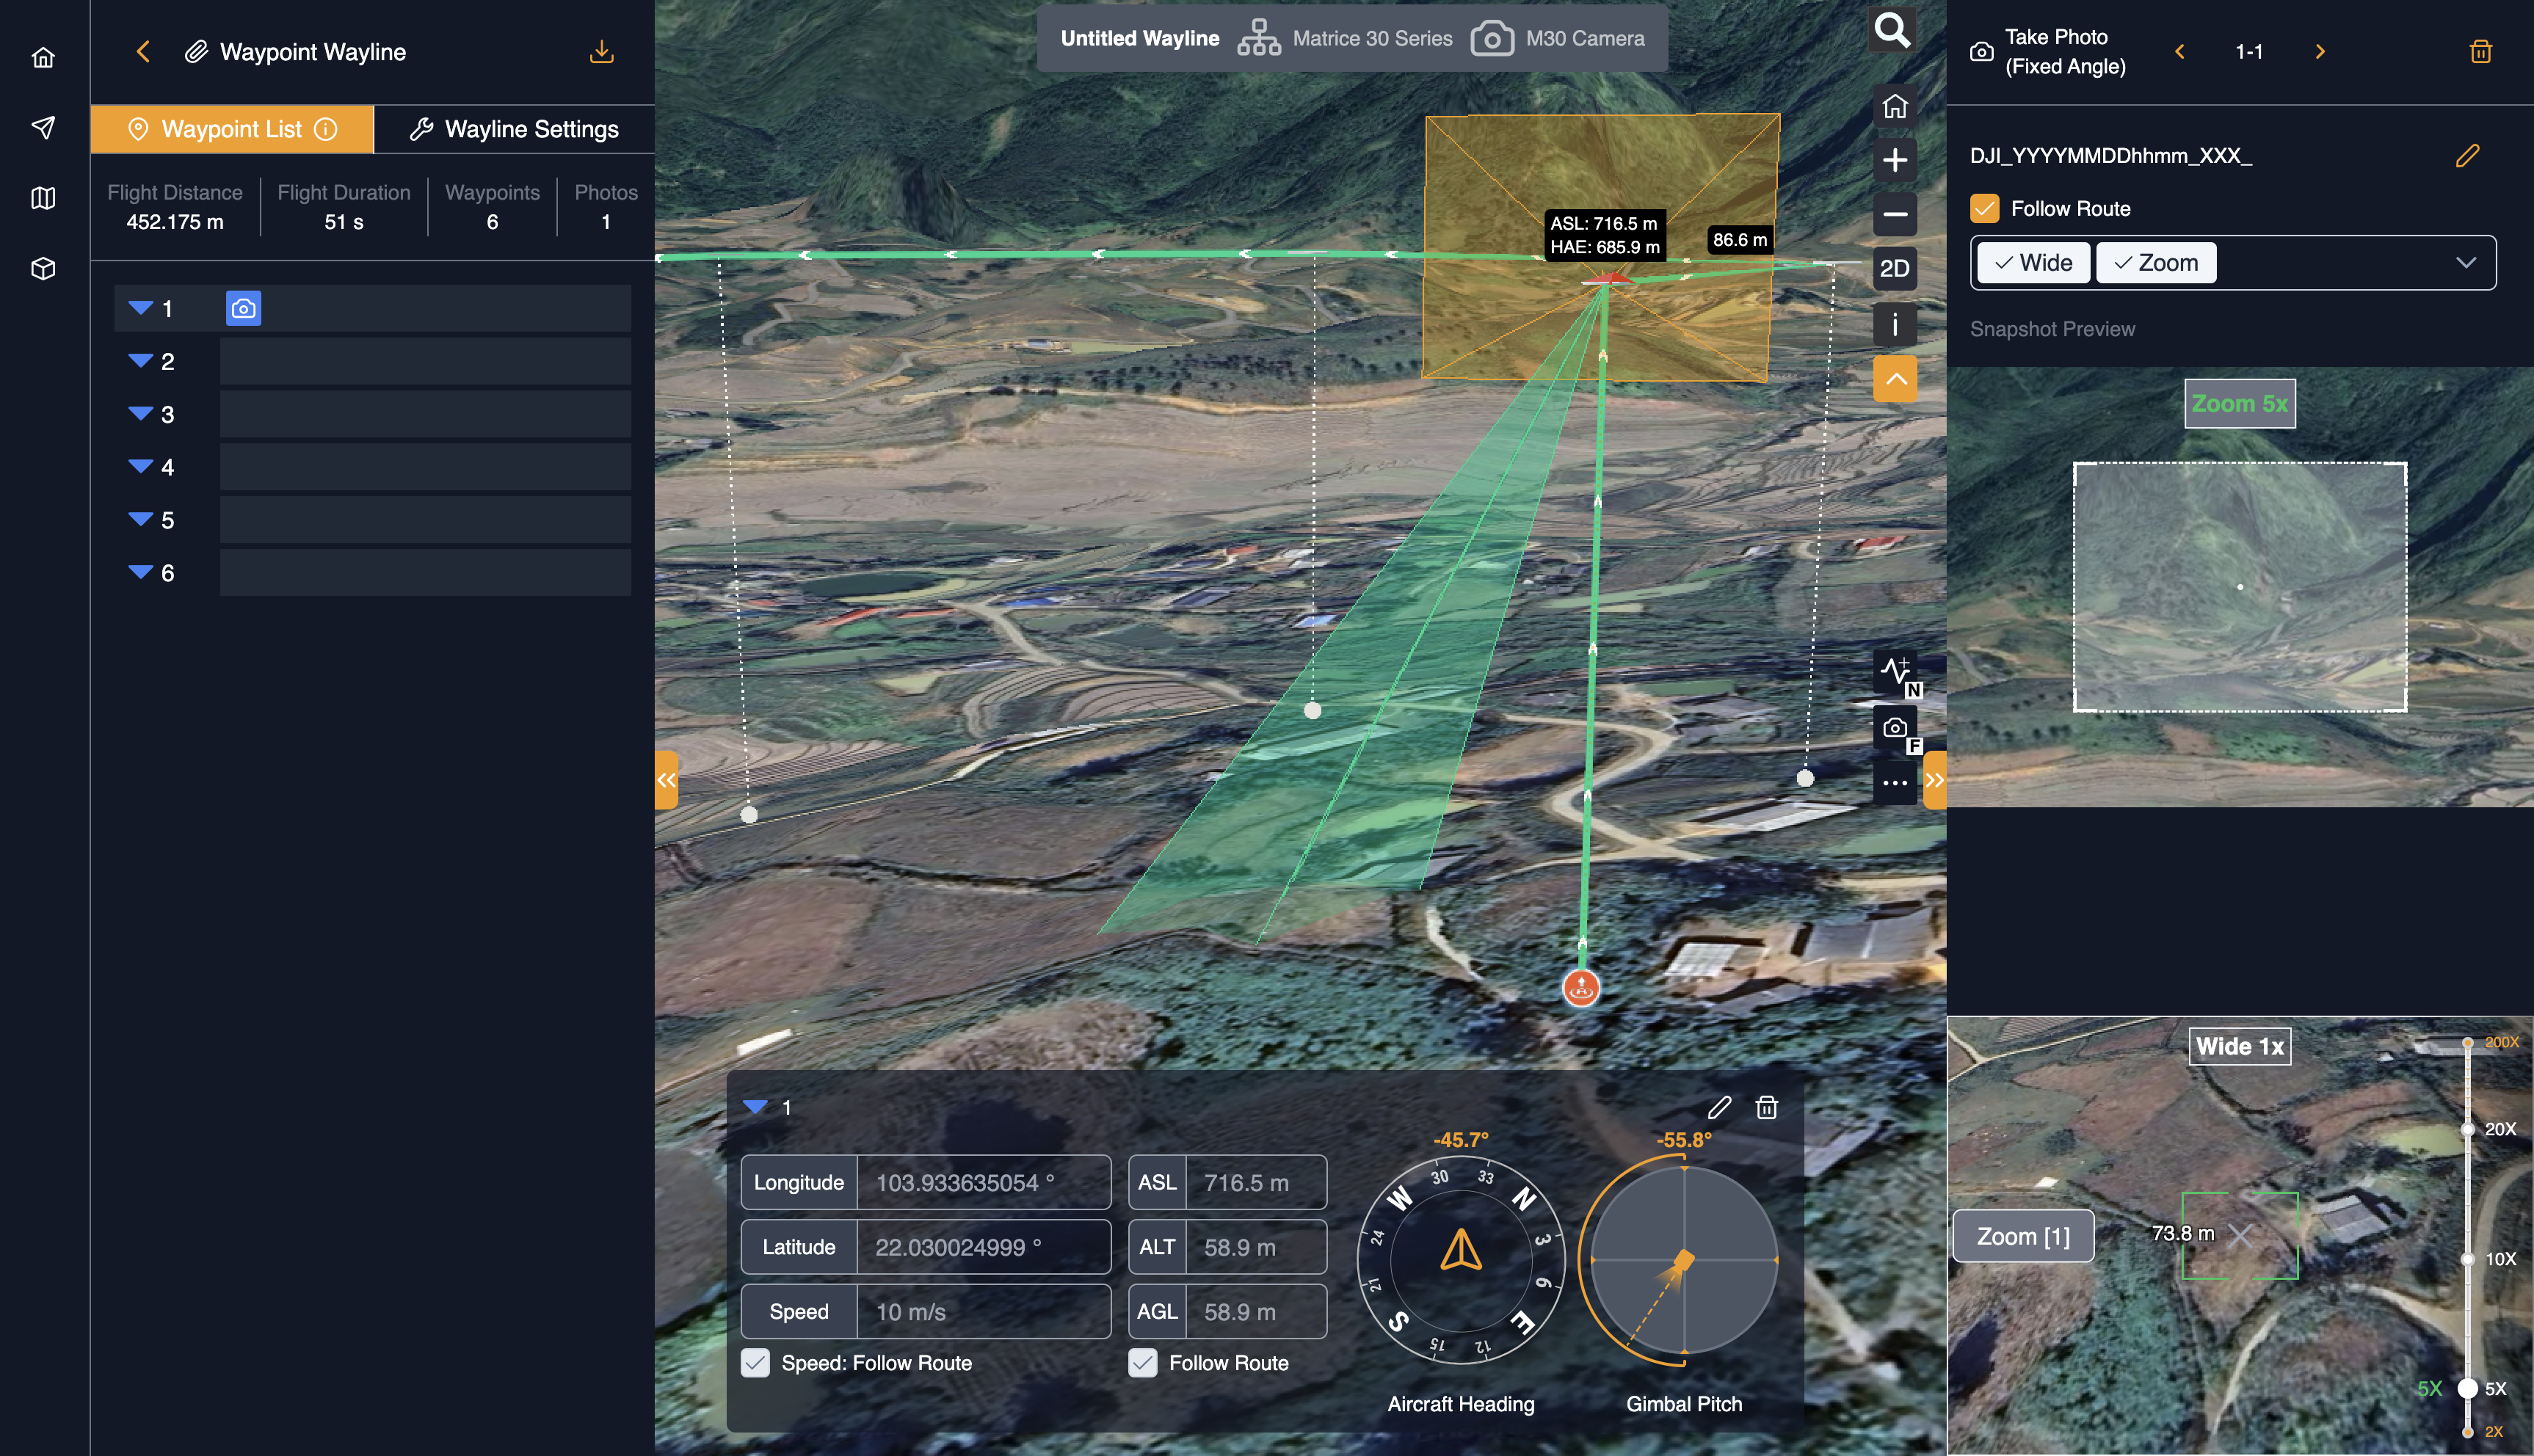
- Left-click the Take Photo (Fixed Angle) action and scroll the mouse wheel to zoom in or out or drag the auxiliary view to adjust the shooting angle on the right side.
Map View
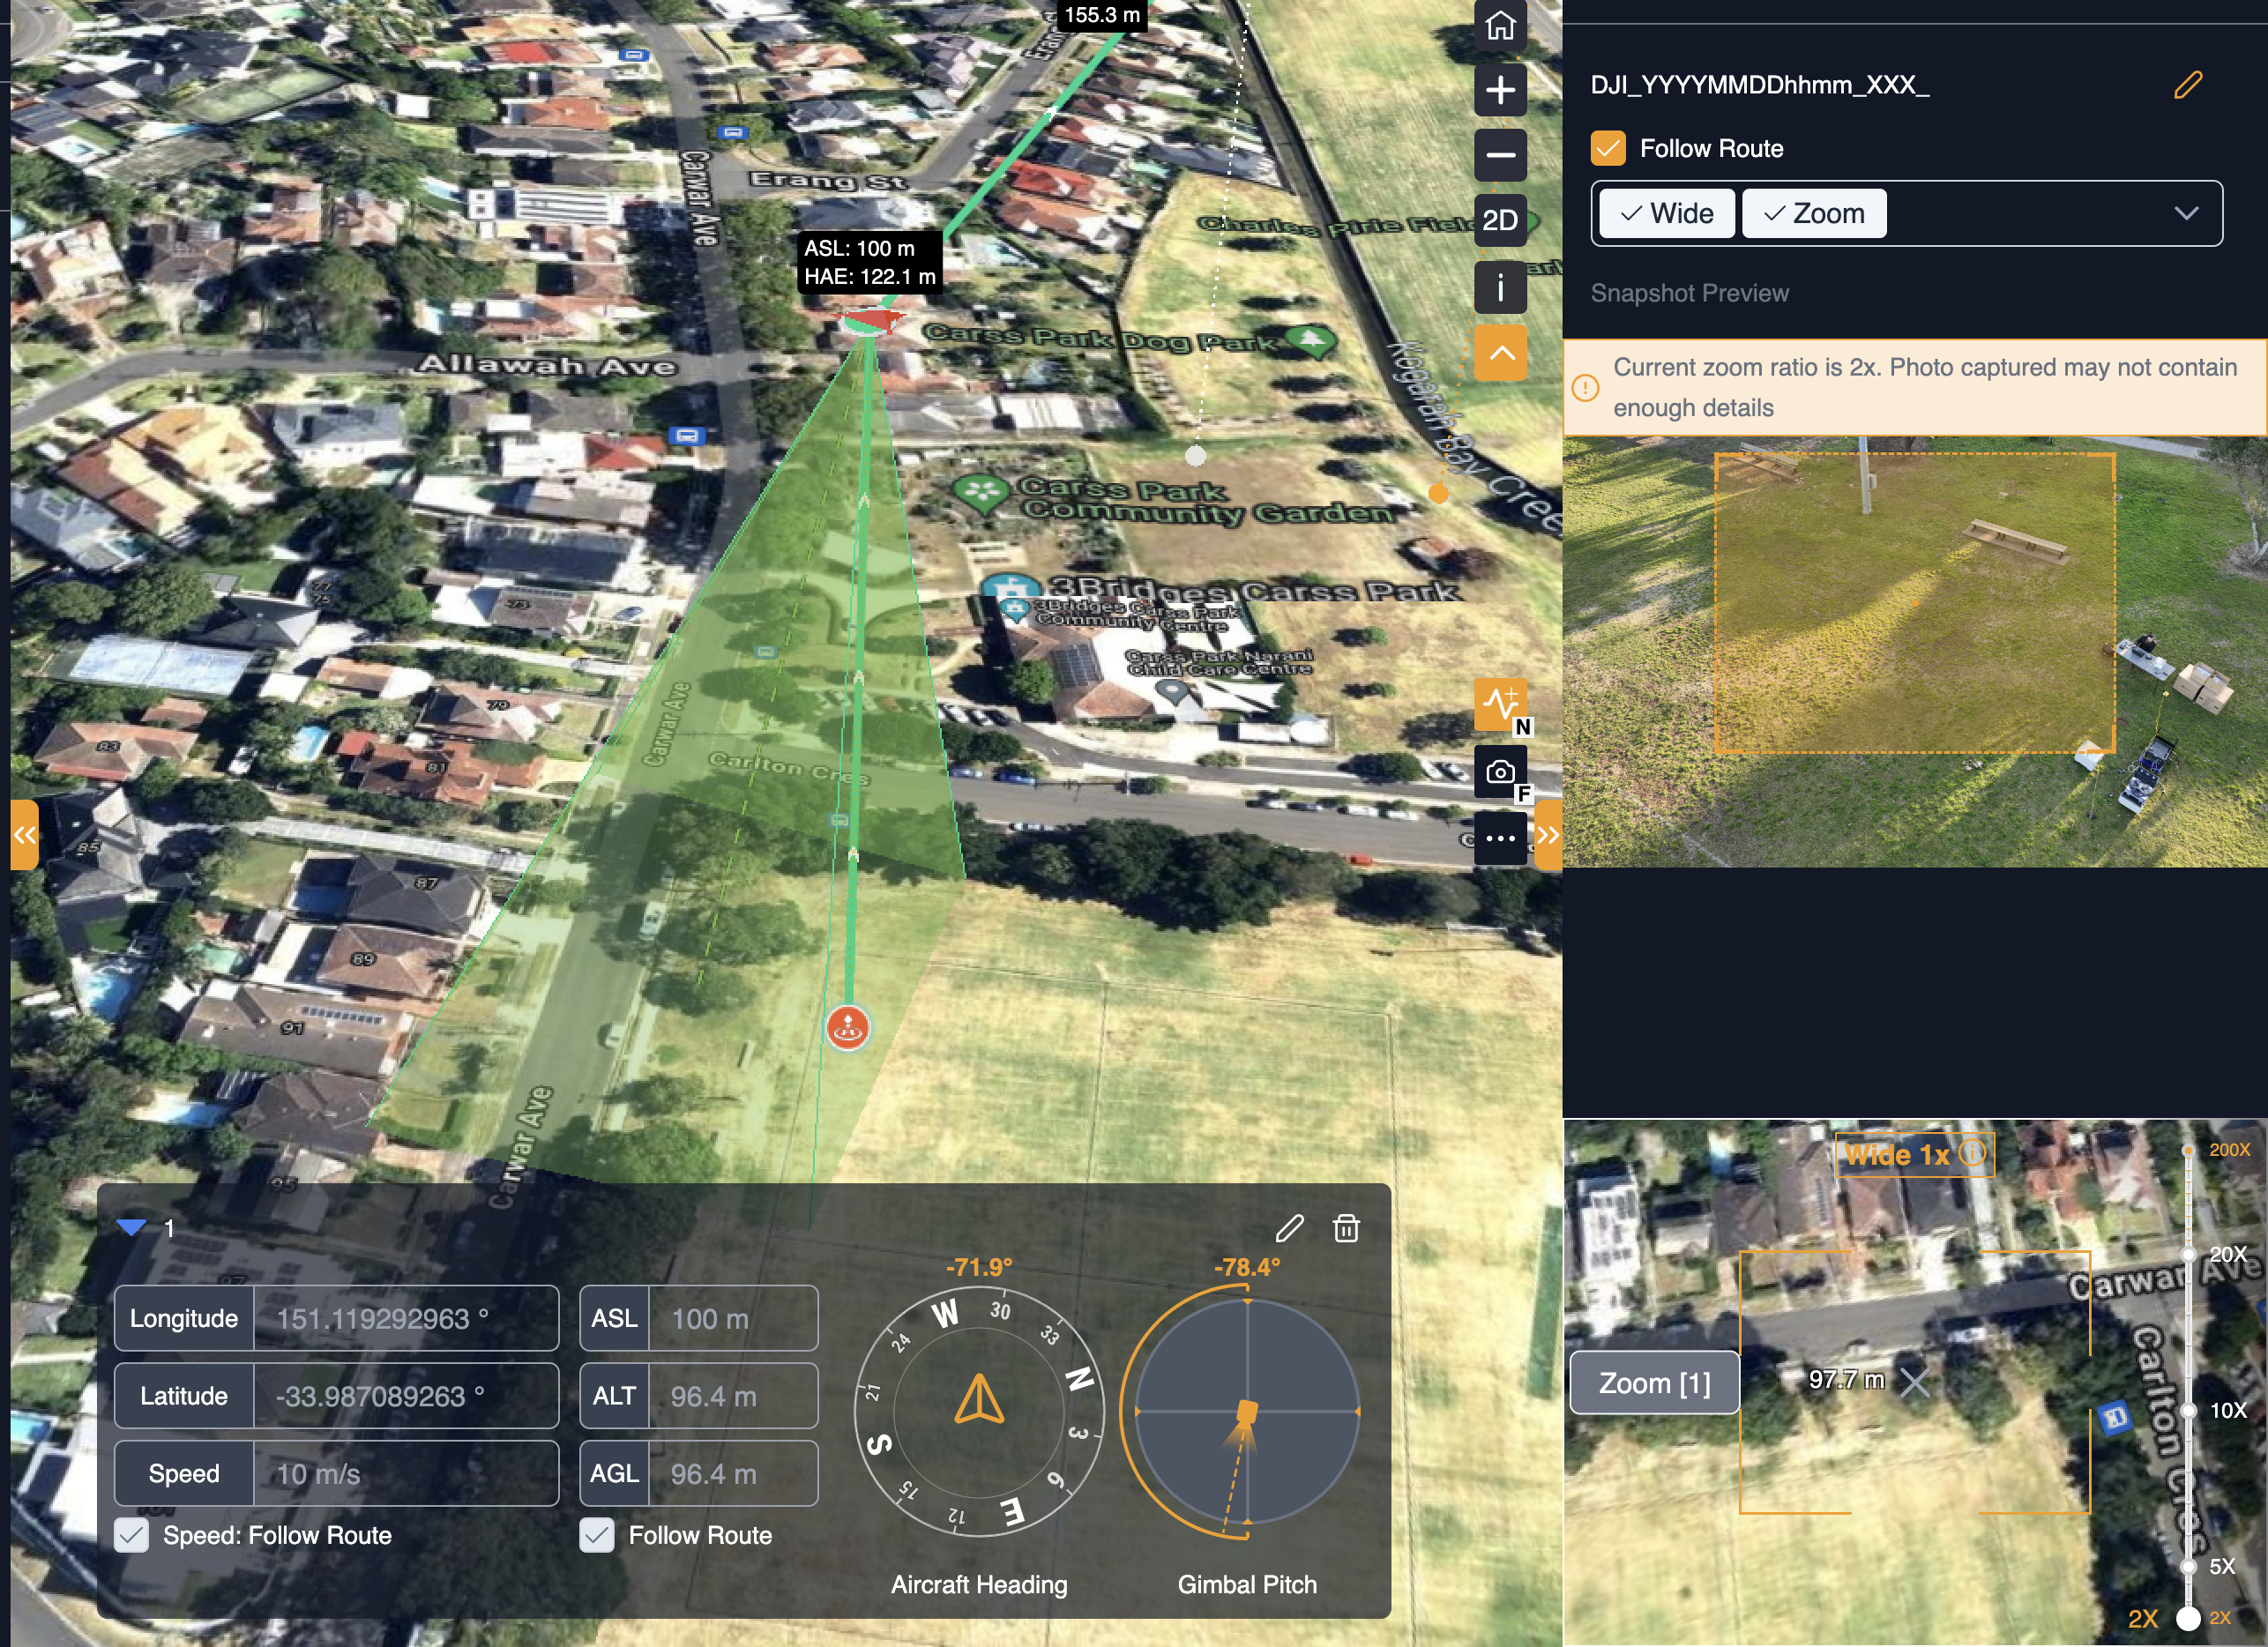
The wayline is shown according to the map view. Once the take-off point is set, the minimap on the right side will display a first-person view camera. Users can interact by dragging the map, using the mouse wheel to zoom in or out, or clicking and dragging the wheel to rotate the map view.
The data in the center of the main view represents the straight line distance between the virtual aircraft and the shooting subject.
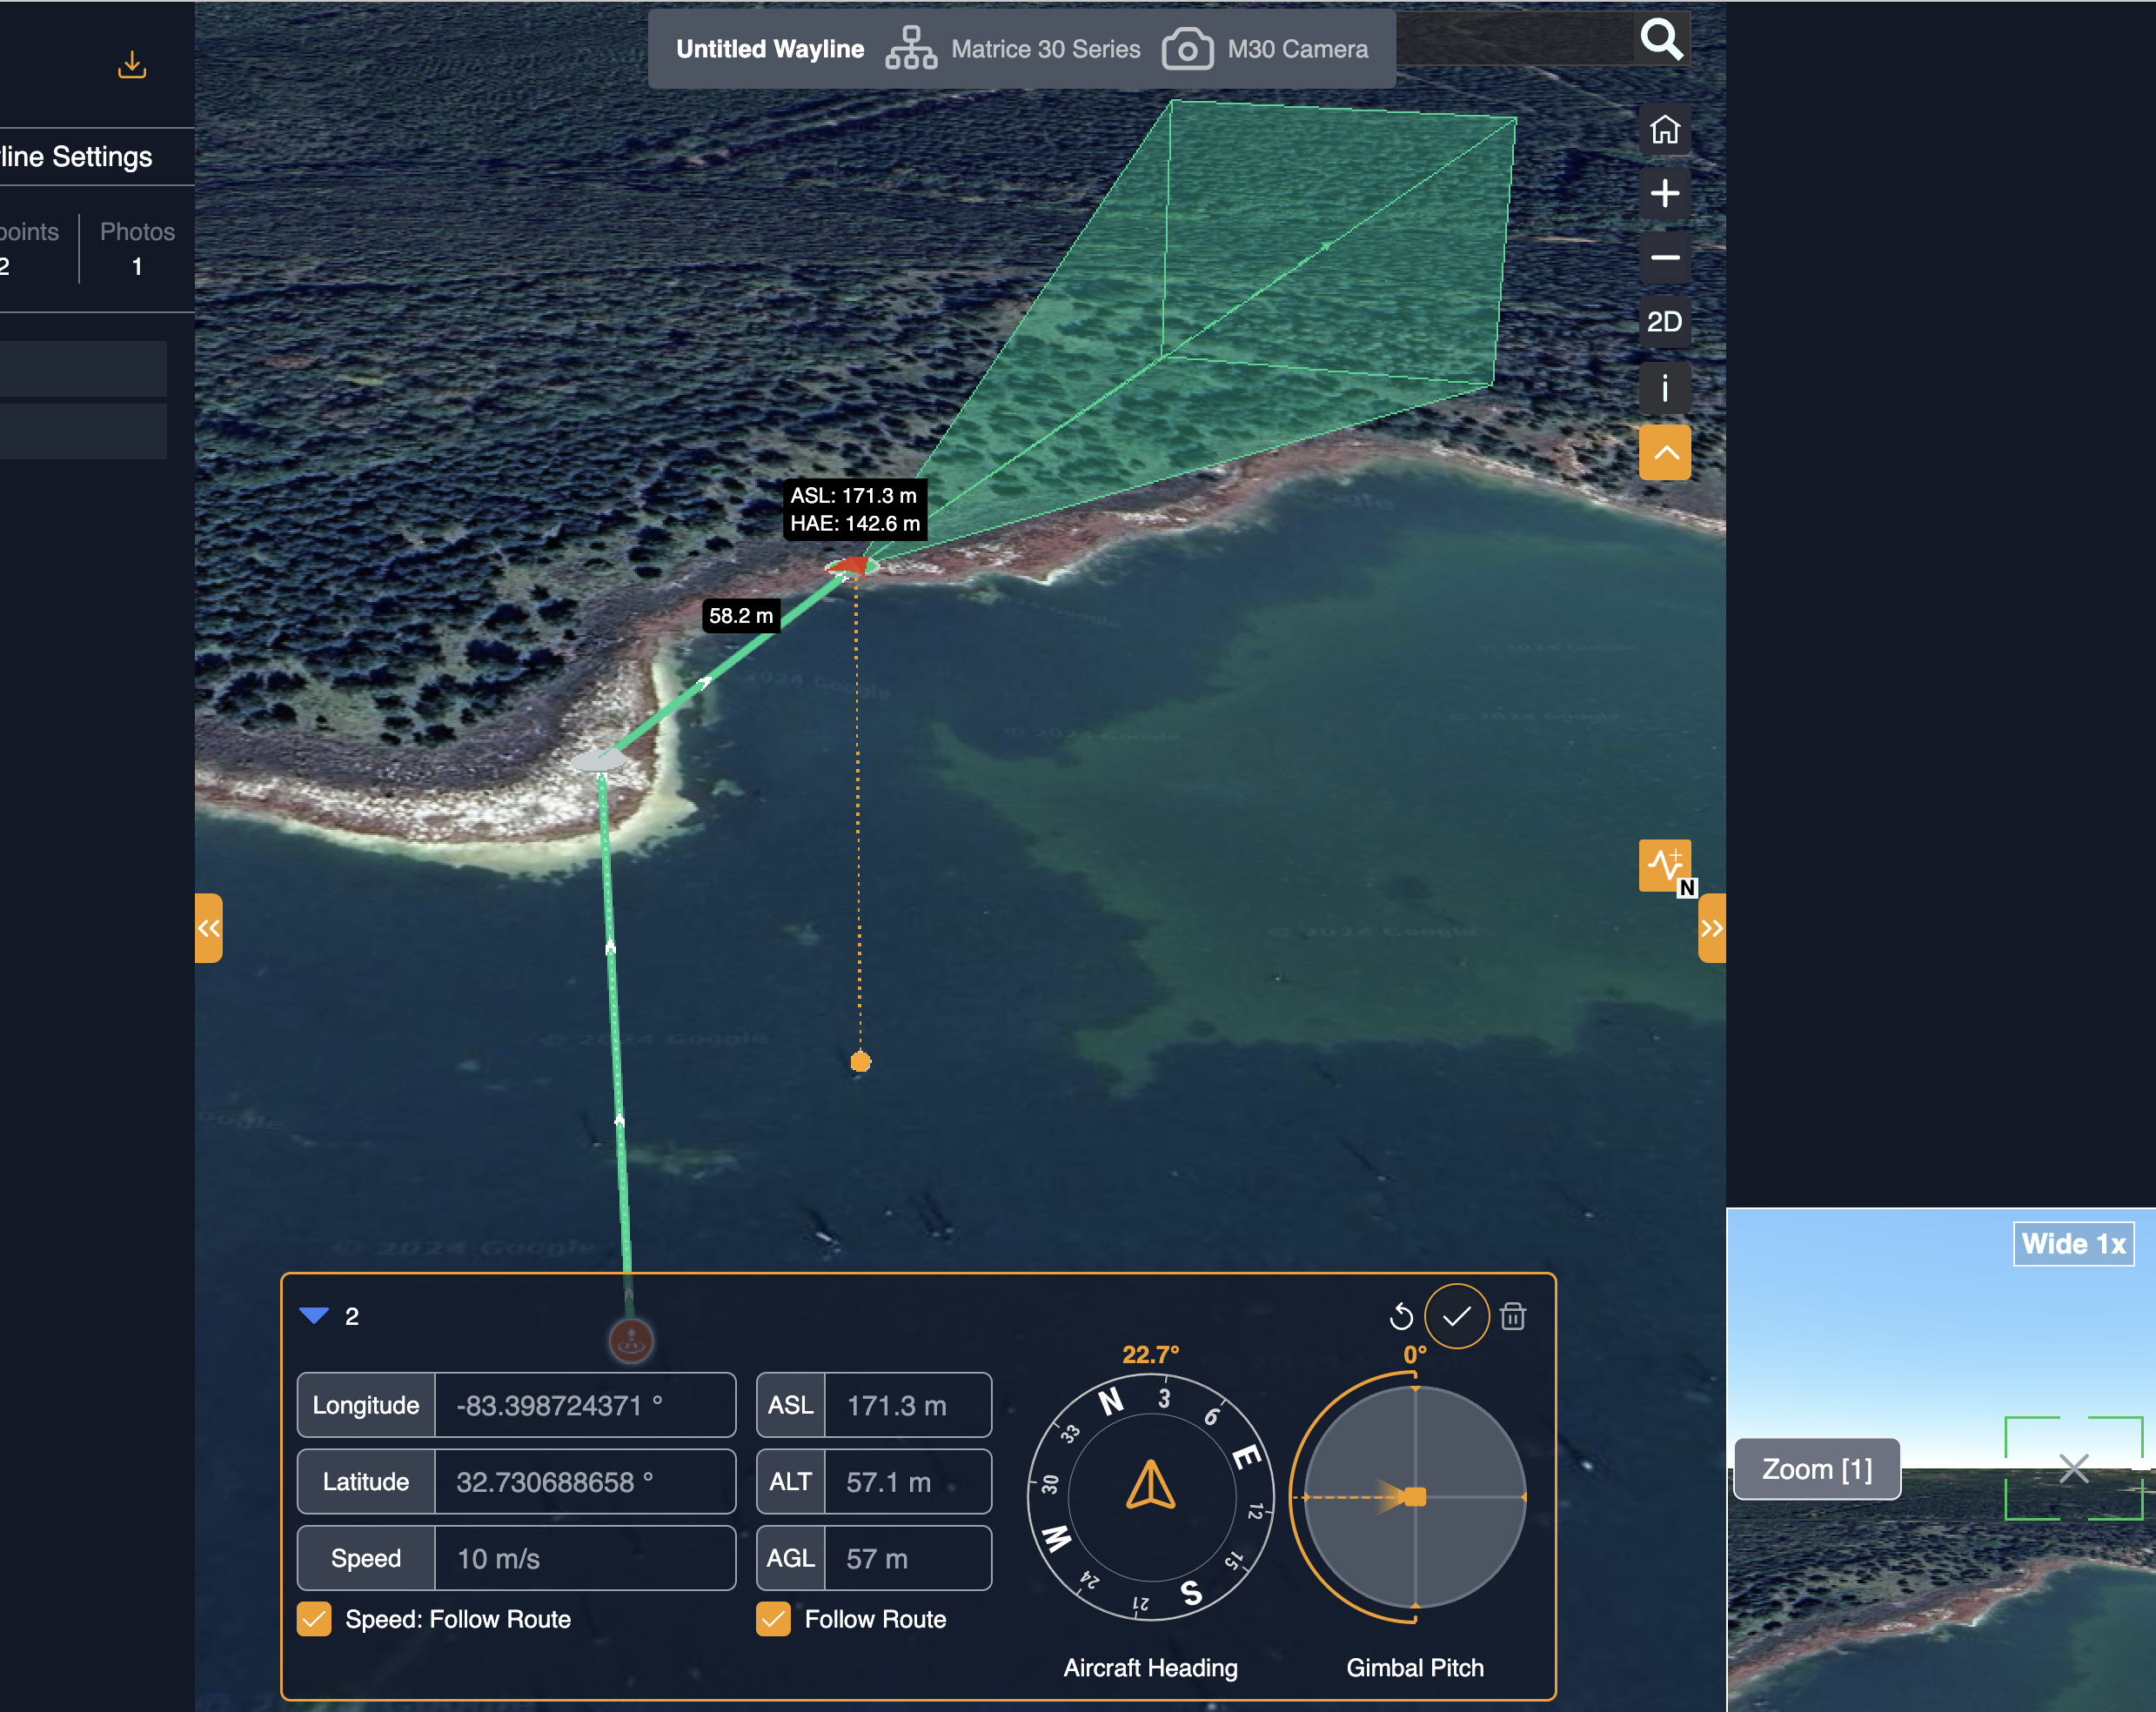
On the main map, users can choose a waypoint to access detailed information in the flight controller situated at the bottom of the page. Similar to adjusting the polygon vertices in the Area Wayline, users can effortlessly drag a waypoint to relocate it, and by hovering over a waypoint marker, they can view the altitude values.
Users should have the ability to modify the altitude values and speed by deselecting the corresponding "Follow Route" checkboxes. Changes made will not take effect until users click on the "save (✓)" icon. Additionally, users can delete the current waypoint by clicking on it. However, they are unable to insert a waypoint thereafter. The system does not allow for waypoint replacement except for the last one. Once a waypoint is deleted, the system will re-draw the entire wayline. Please refer to the following picture for more information:
Action Editor
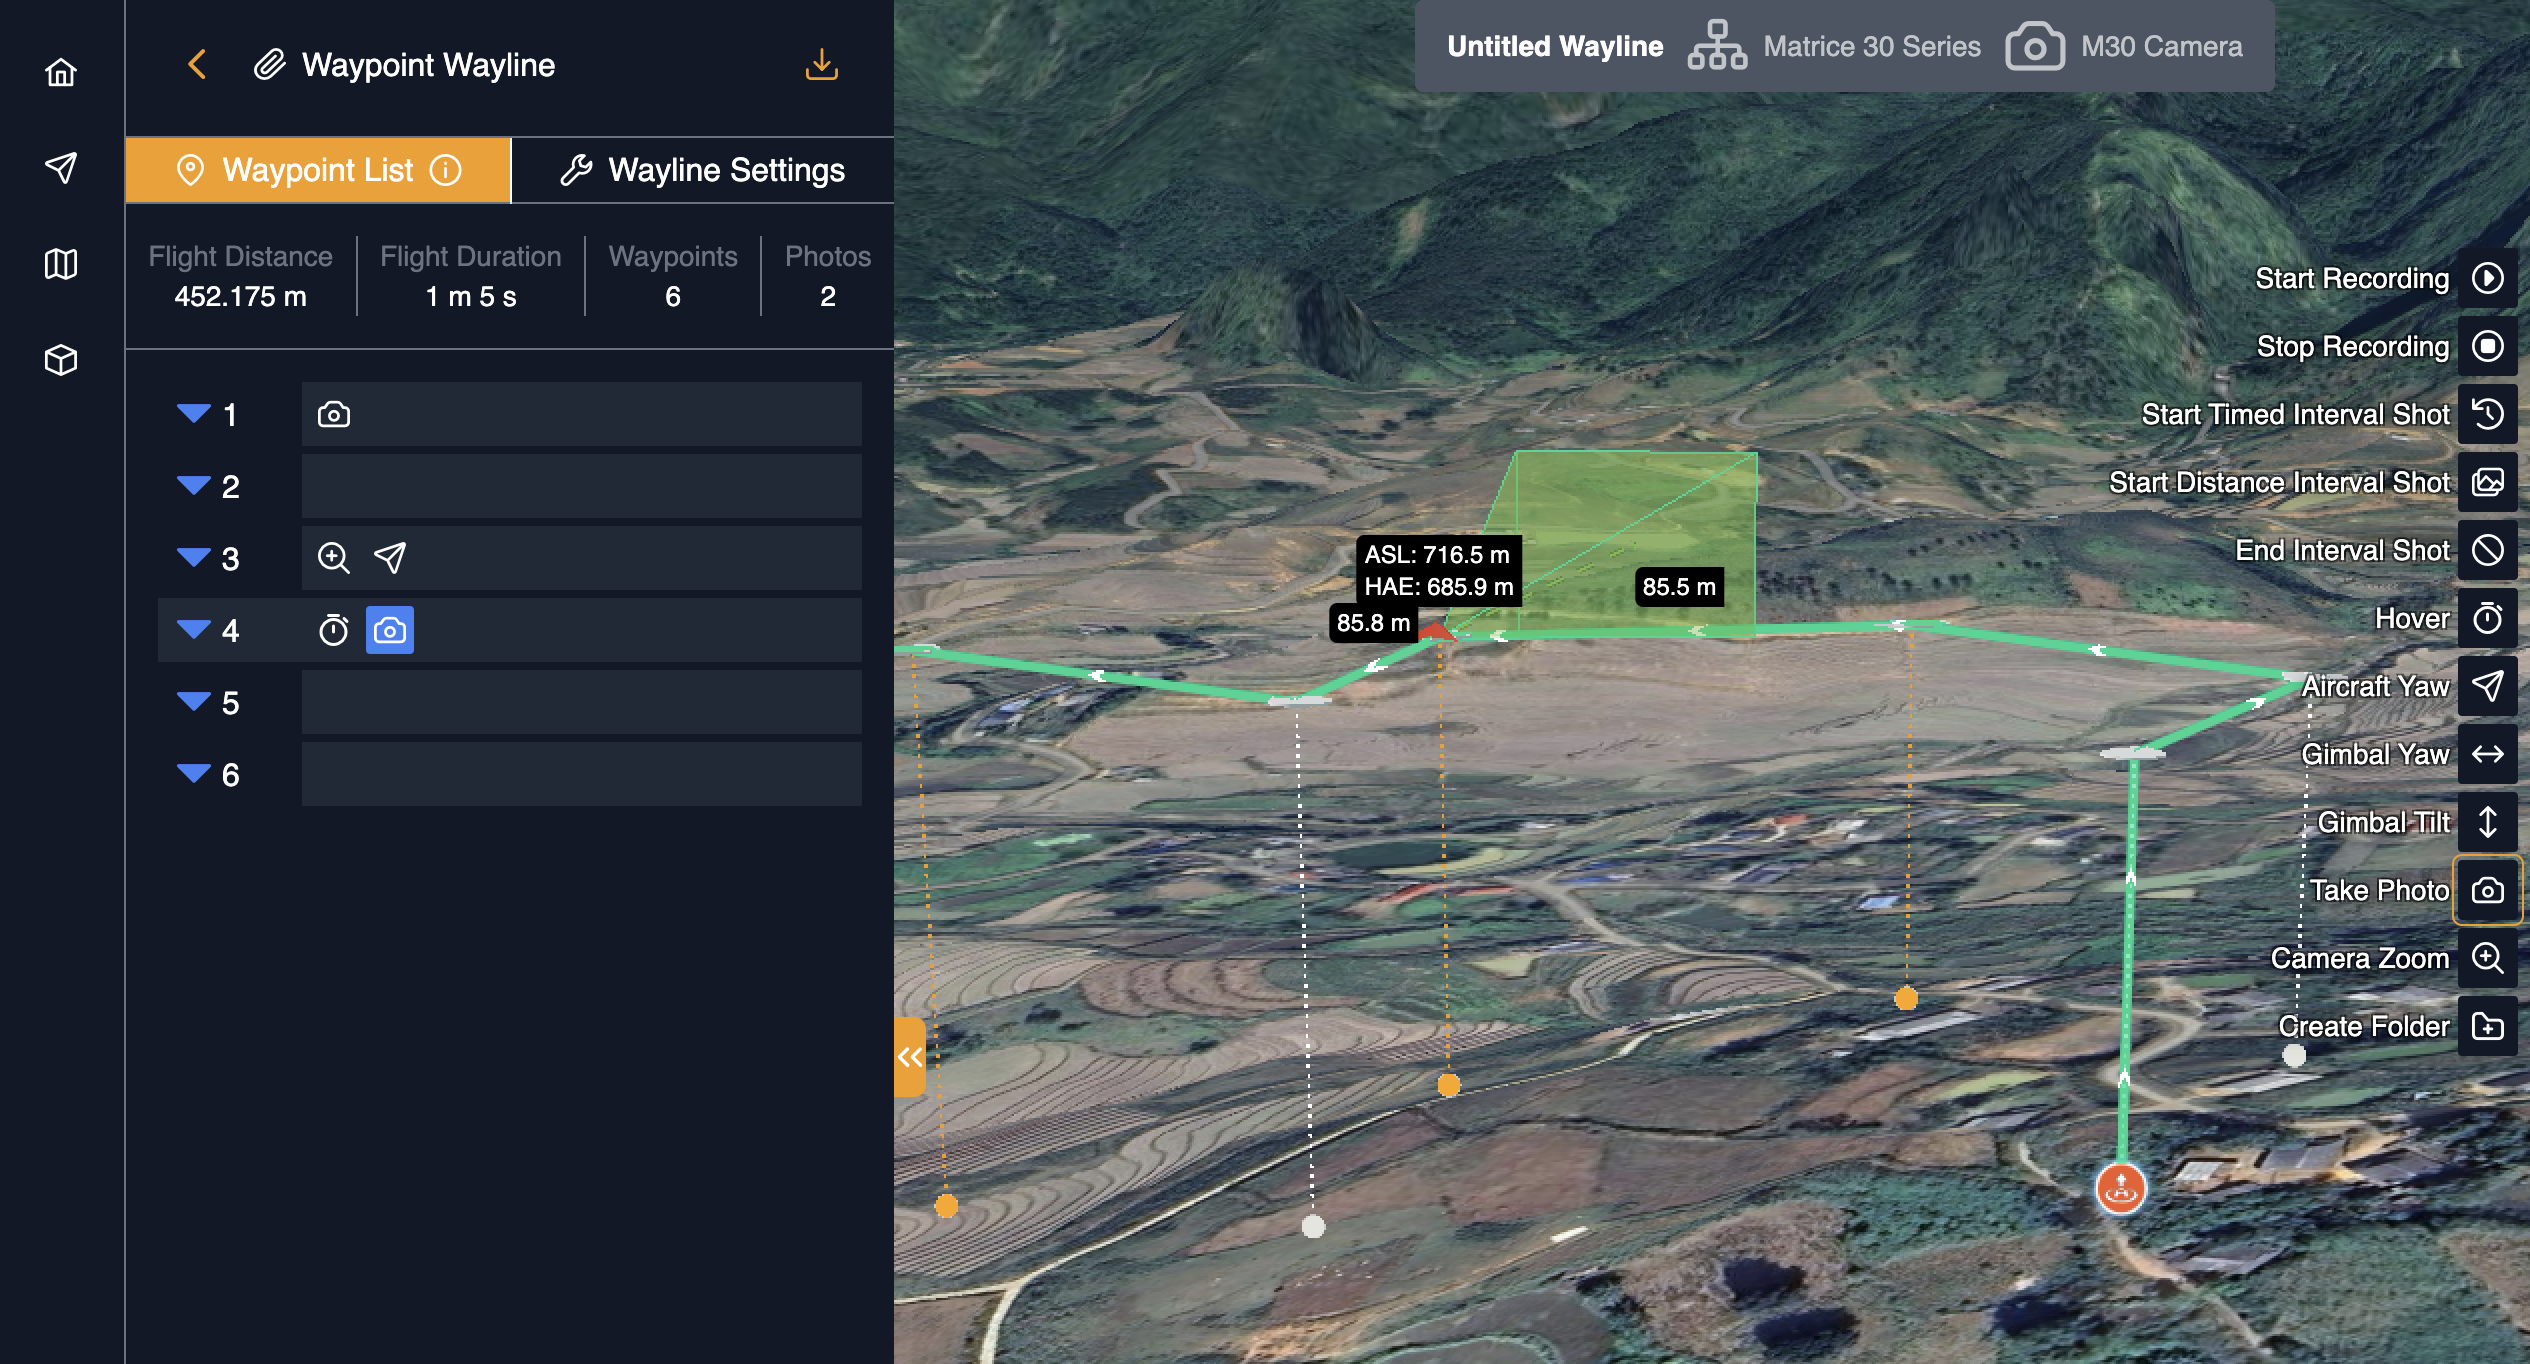
The newly added action will appear in the left sidebar under the "Waypoint List" section. The angles of each action will be influenced by the preceding ones. For instance, if an aircraft yaw action is set at 90°, subsequent actions like hover should maintain this same aircraft yaw angle of 90° which is the angle of the aircraft yaw action. This implies that all actions will mirror the focal distance, aircraft yaw, gimbal tilt, and gimbal yaw angles of the preceding actions, unless they specify their own values.
In addition to the Take photo (Fixed Angle) action, there is a variety of other action types that users can add to a waypoint as follows:
- Create Folder
- Camera Zoom
- Take Photo
- Gimbal Tilt
- Gimbal Yaw
- Aircraft Yaw
- Hover
- End Interval Shot
- Start Distance Interval Shot
- Start Timed Interval Shot
- Start Recording
- Stop Recording
Displays details of the selected waypoint action. The "Take Photo Fixed Angle" action is a specific feature that Users can preview the zoom photo effect based on the selected camera payloads. After the flight is completed, that snapshot will be replaced with a real photo.
At the top of the screen, a warning popup will appear if any invalid actions are detected within the wayline. There is a component specifically designed to validate the action parameters, located in the file components/wayline/waypoint/WaypointError.vue. Actions such as exceeding the gimbal tilt limit or starting an interval shot without completing it will be flagged as invalid. Additionally, an error popup will appear if the gimbal yaw angle exceeds its limitations as well as the waypoint icon on the left sidebar will be highlighted as red.

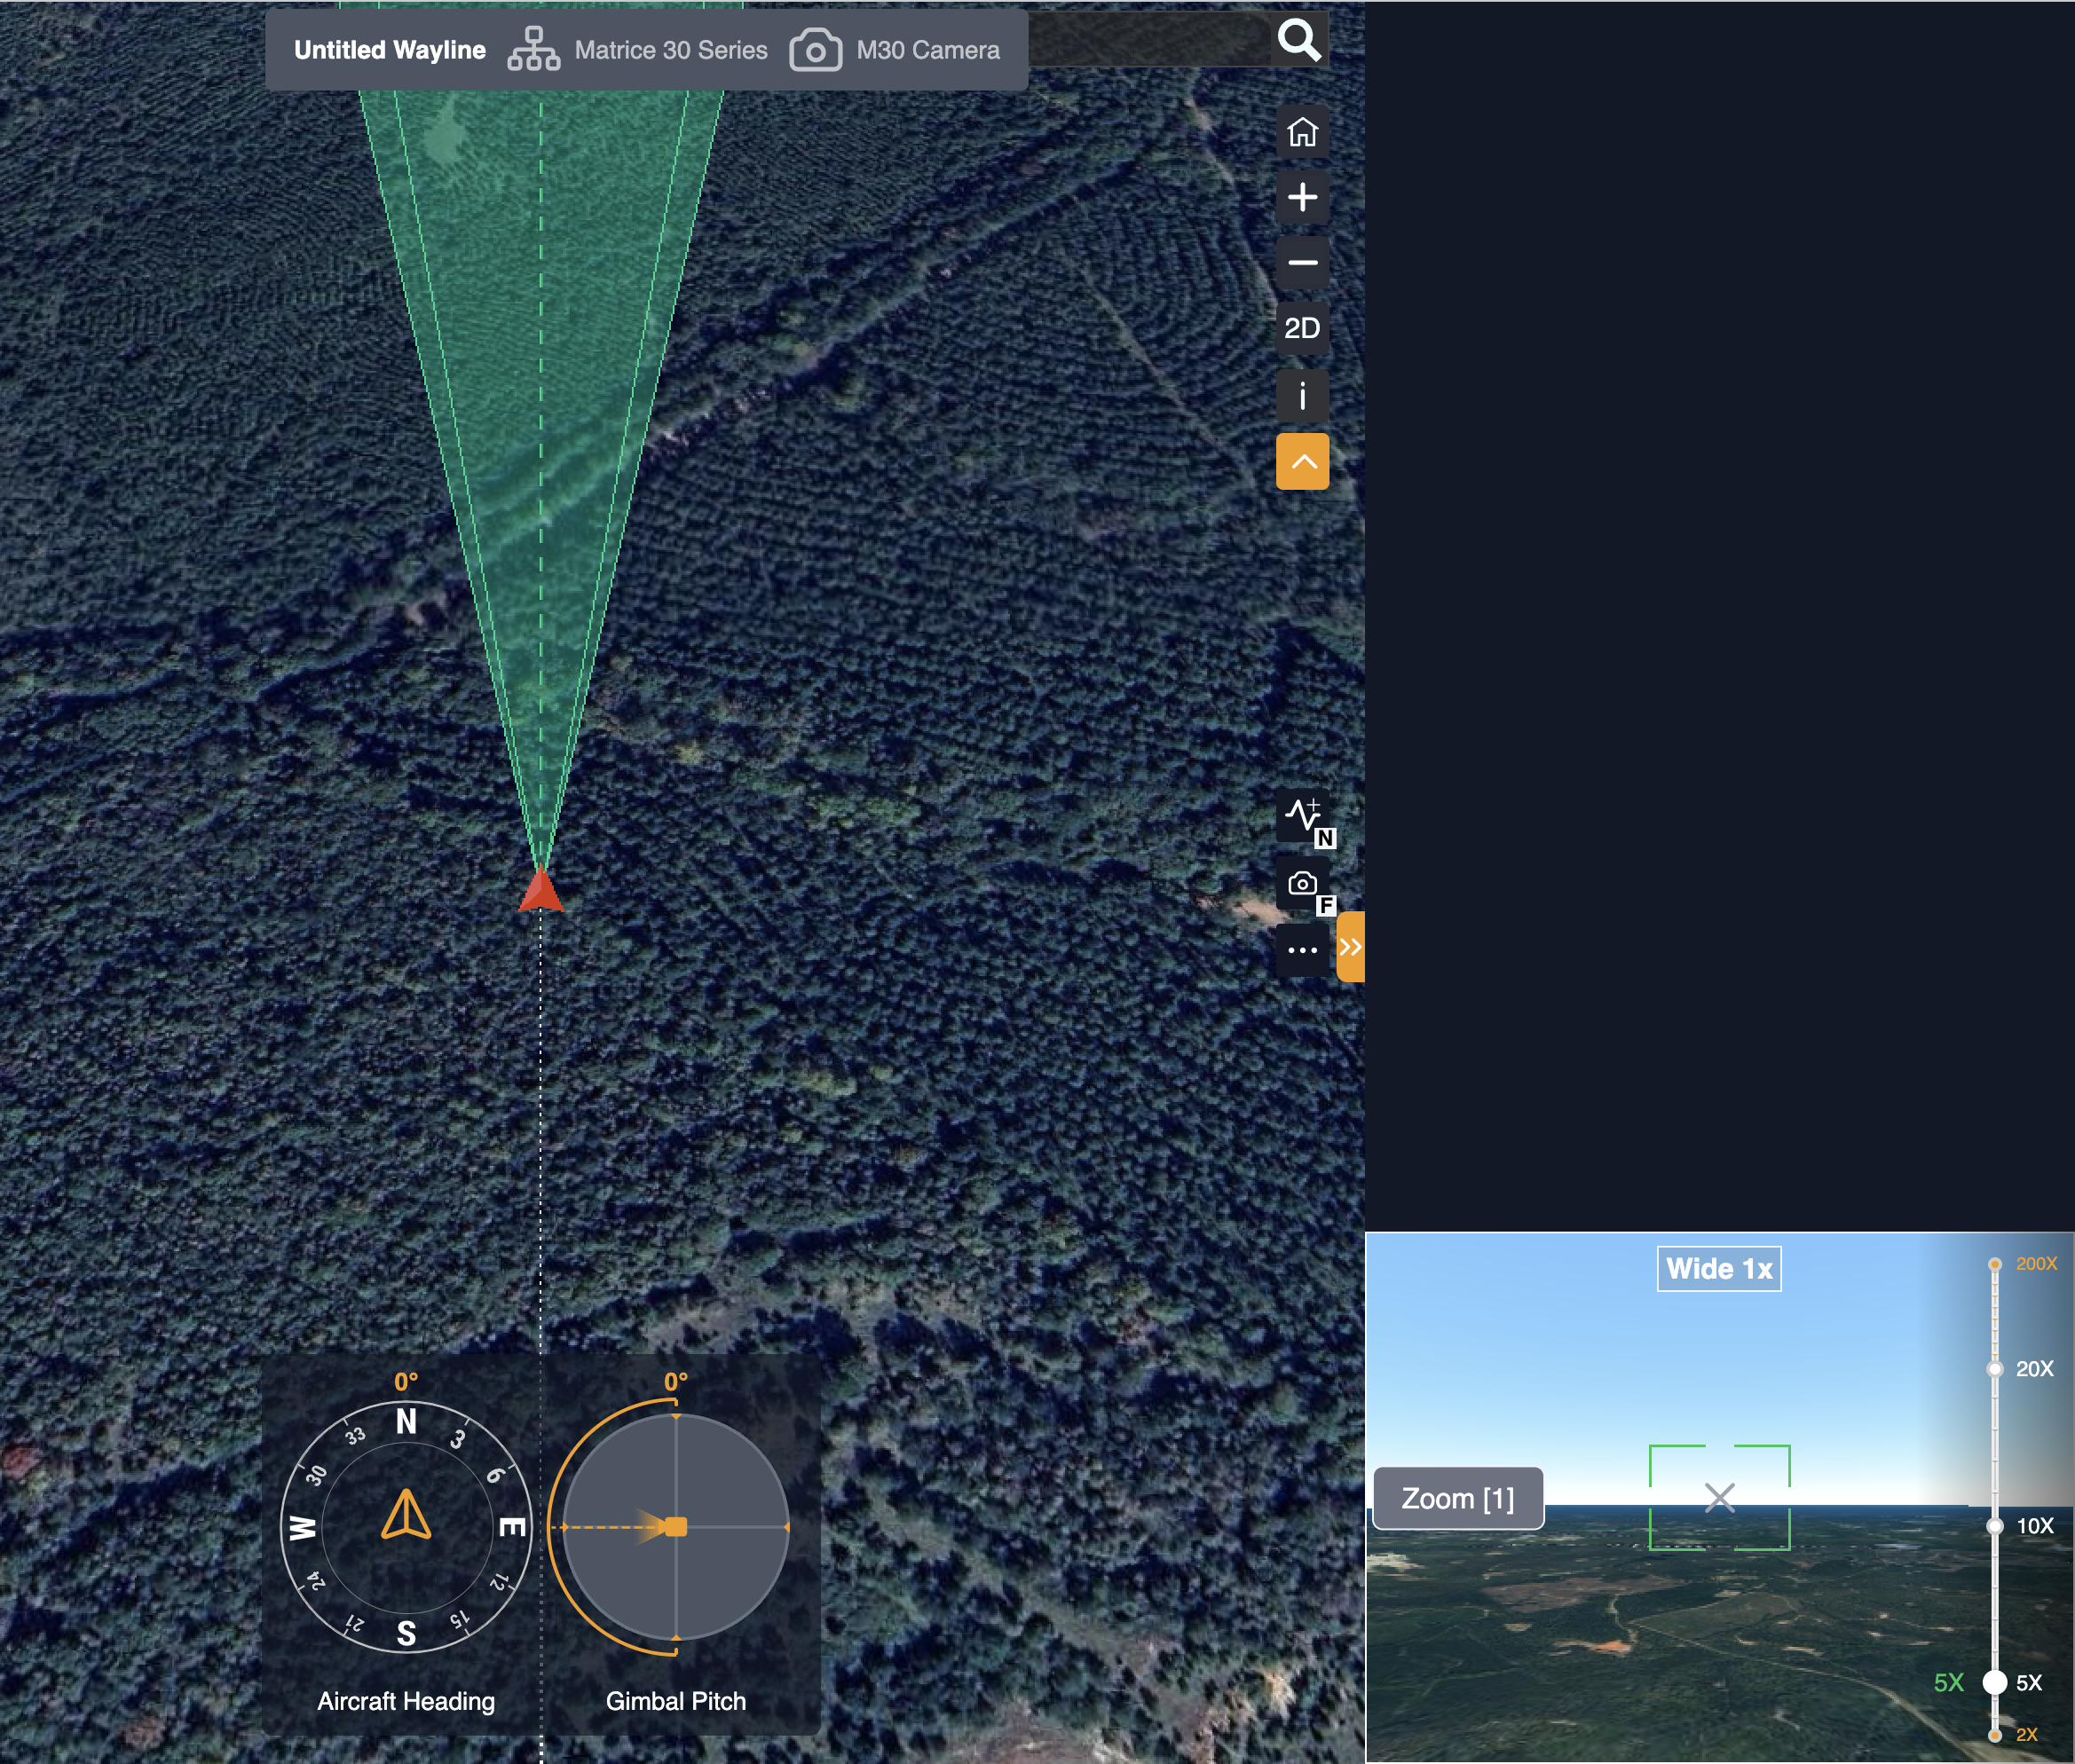
Auxiliary View
Displays the flight route based on the first-person view. Users can scroll the mouse wheel to zoom in or out or drag the auxiliary view to adjust the shooting angle.
Flight settings
Similar to the Area Wayline, users can adjust some flight parameters located on the left sidebar. Users can move the mouse over ![]() to view the setting descriptions and modify the global settings.
to view the setting descriptions and modify the global settings.
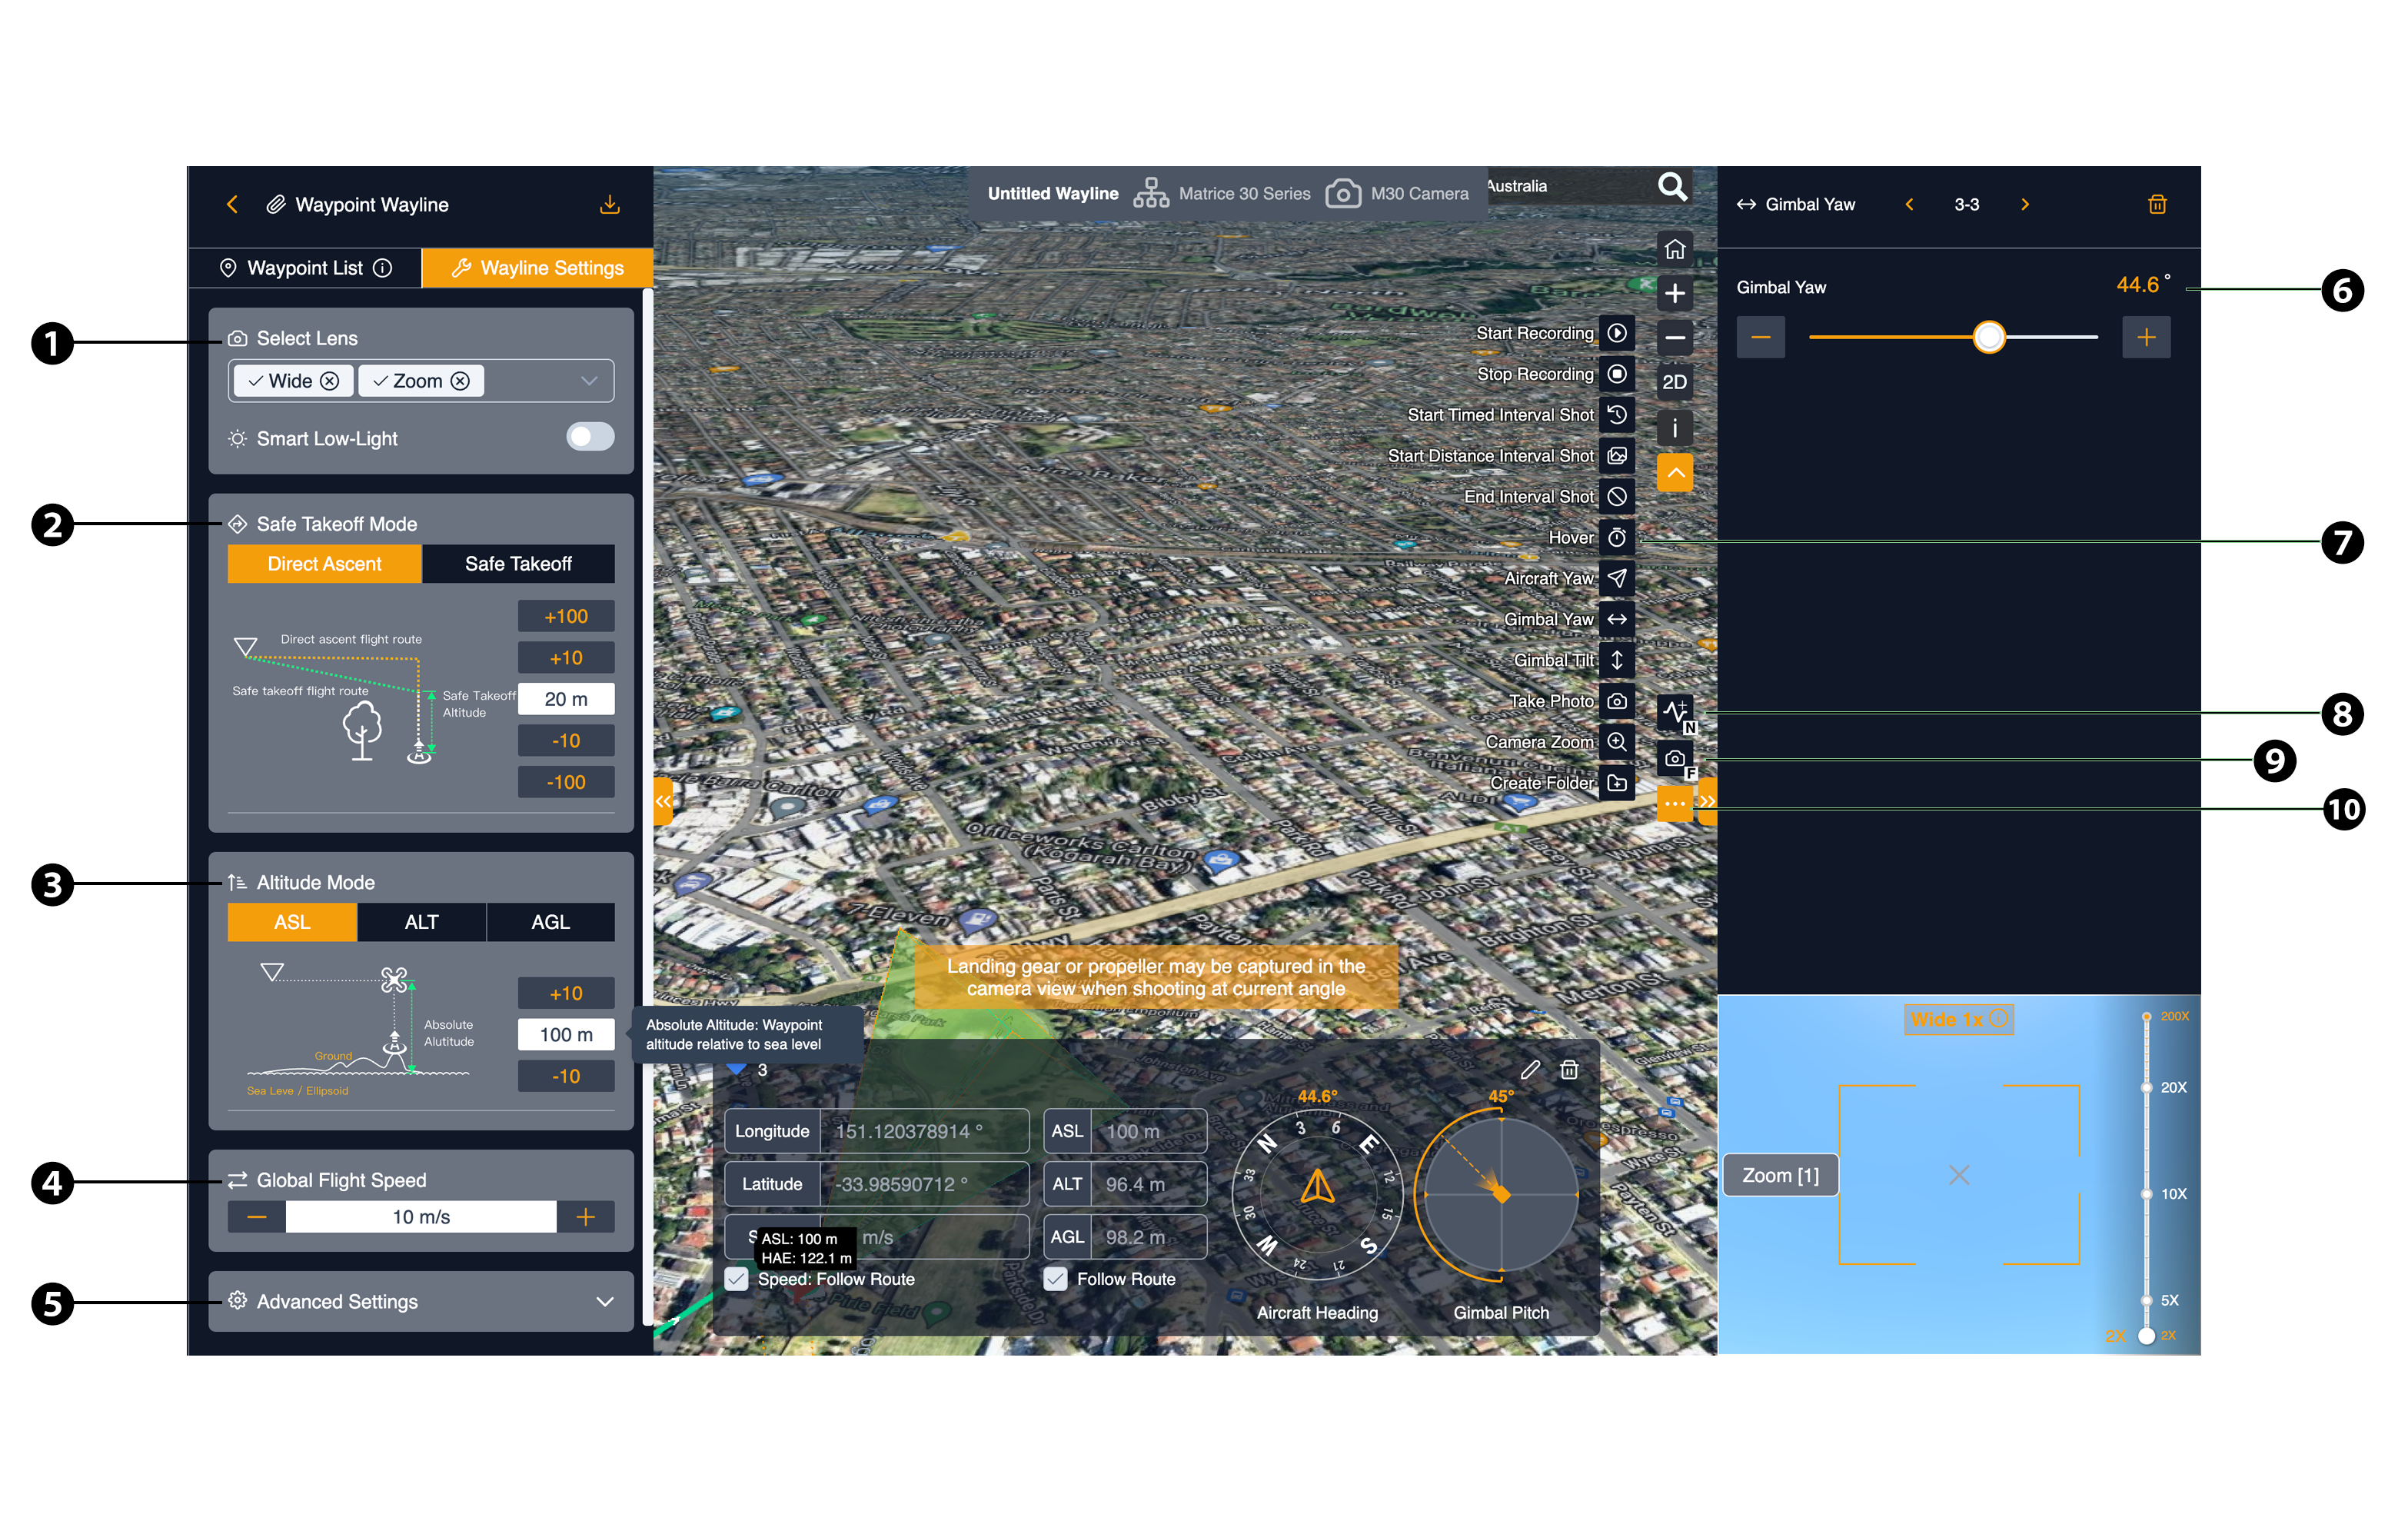
1. Select Lens
Defines the drone’s camera lenses that support DJI drones such as Matrice 30 Series, Matrice 3D Series, Mavic 3 Enterprise Series. The users can select multi camera lenses if needed.
Users can select lenses when the aircraft supports multiple lenses.
2. Safe Takeoff Altitude (ALT)
Safe Takeoff Altitude is the altitude relative to the takeoff point altitude. Aircraft will ascend to the safe takeoff altitude after takeoff and fly to the flight route start point.
3. Altitude Mode
Defines three types of altitude:
- Absolute Altitude: Waypoint altitude relative to sea level.
- Altitude Relative to Takeoff Point (ALT): Waypoint altitude relative to takeoff point altitude.
- Above Ground Level (AGL): Consistent altitude relative to model ground based on terrain follow file.
The data of the ground elevation can be sourced from the global elevation data and the user-imported models. Data source priority: 3D model elevation data > 2D model elevation data > global elevation data When there are more than one 3D model in the same mapping area, the highest altitude of the terrain surface will be regarded as the ground level.
4. Global Flight Speed
Specifies the aircraft flight speed within a range from Slow to Fast (default) for all waylines. The maximum speed is contingent upon the flight altitude.
5. Advanced Settings
- Takeoff Speed: The velocity at which a drone ascends from the ground during takeoff. This speed is crucial for ensuring a smooth and controlled liftoff, allowing the drone to stabilize quickly and begin its wayline. The takeoff speed can vary based on the drone model, its design, and the environmental conditions.
-
Gimbal Control:
- Manual: Allows manual control of gimbal tilt when aircraft flies towards next waypoint. Aircraft will maintain its original gimbal tilt angle from last waypoint if not controlled manually.
- For Each Waypoint: Gimbal tilt angle changes evenly when aircraft flies from one waypoint to the next.
-
Upon Completion: Only RTH(Return to Home) is supported when creating a flight plan.
6. Edit action parameter
Allows users to modify the action parameters after added.
7. Add action
Apart from the "Take Photo (Fixed Angle)" action, which is transparently displayed on the right side, the remaining actions are concealed until users click on the "..." button to reveal the list of available actions to add.
8. Add new waypoint
Click on the ![]() button and then click on the main map to add a new waypoint.
button and then click on the main map to add a new waypoint.
9. Add Take Photo (Fixed Angle) action
Click on the ![]() button or press key
button or press key F to add a new Take Photo (Fixed Angle) action.
10. More Action
As discussed earlier in Section 7 (Add action), click on the three-dot (...) icon button to display all the action types that can be added to the waypoint.